
“Thinking outside the box led us to consider alternatives to raising the whole house. Clark Construction's alternate remedy gives the homeowners the peace of mind they sought as well as great additional interior space, optimizing the use of their remodeling funds."


High and Dry at Last
(Wilton, CT)
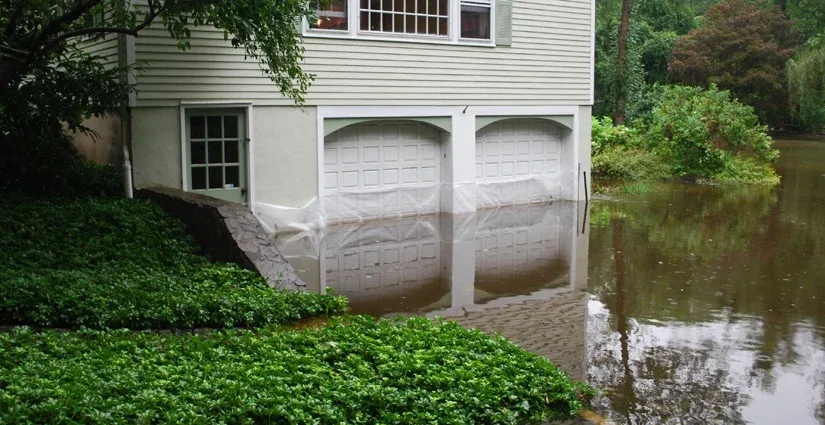
Imagine buying a home with a beautiful brook in the backyard. Now imagine that same brook causing your partially below grade playroom and garage to flood in heavy rains, a “phantom menace” that comes and goes and so quickly, most often at night, so that you hardly ever actually see it in daylight.
Other firms suggested raising the whole house, an extremely costly proposition.
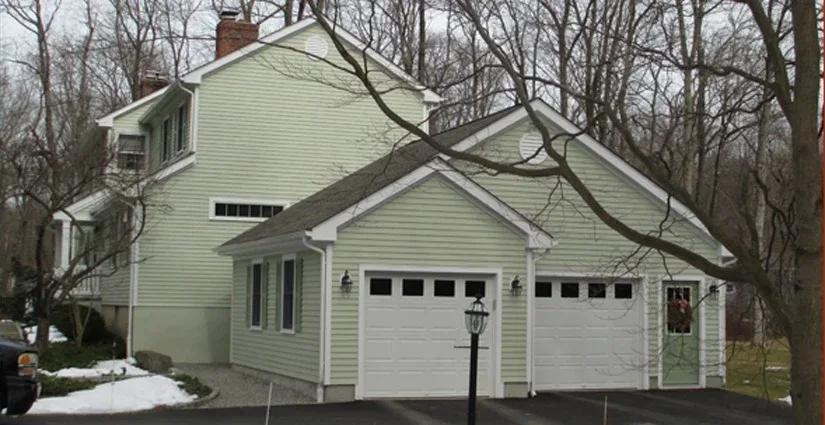
We channeled the clients’ money differently - developing a solution that involved closing off water access points and building a new garage slightly above the flood plain, then adding a new mud room entry and a master suite addition to top it all off. The additions blend seamlessly with the home’s original architecture.
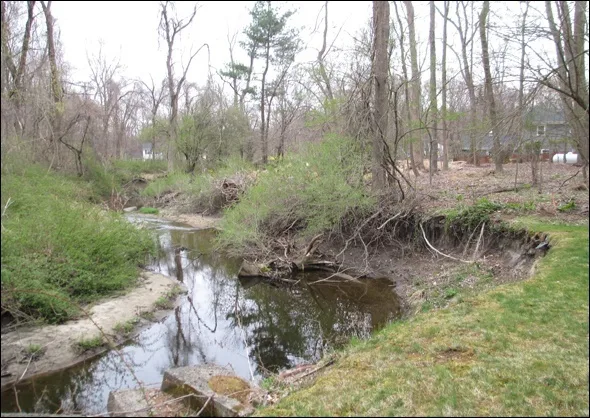
It’s hard to imagine the volume of water that appeared and the extent of the water problem, but here are a few shots that help to tell that story.
Here’s the stream. Actually it’s the Silvermine River, part of the Norwalk River Watershed.
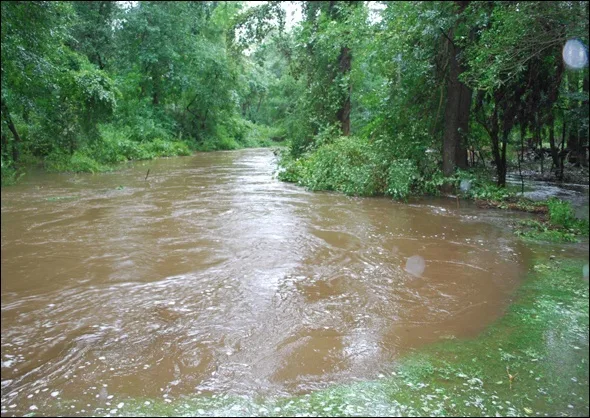
It wasn’t unusual for the water level to rise eight feet or more for a short time during storms.
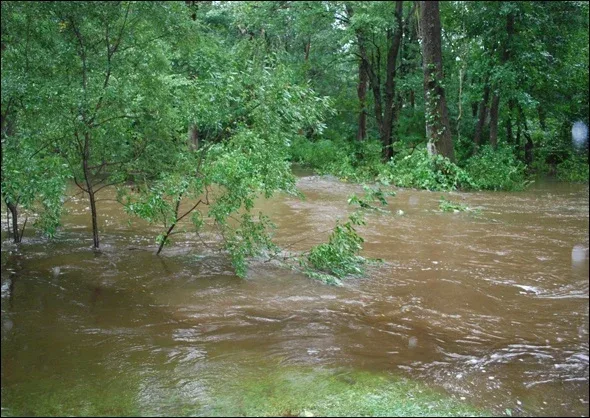
The good news was that when this happened, the stream rose suddenly and then quickly subsided.
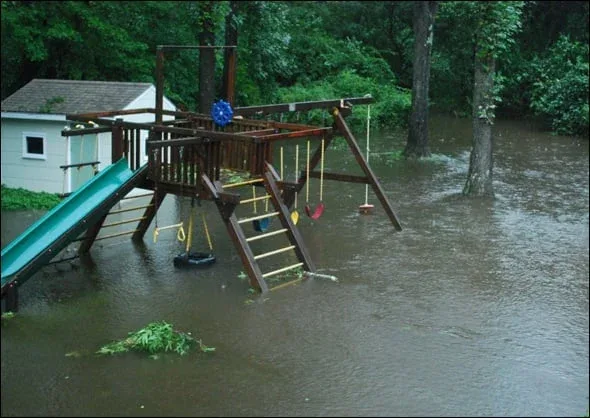
During these surges, the water typically totally flooded the backyard. Here’s the swingset as seen from the porch. No place to play unless you like to swim.
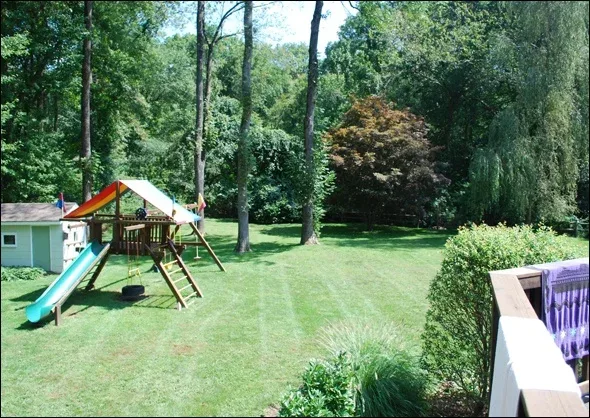
The same view, from the porch, on a normal day.
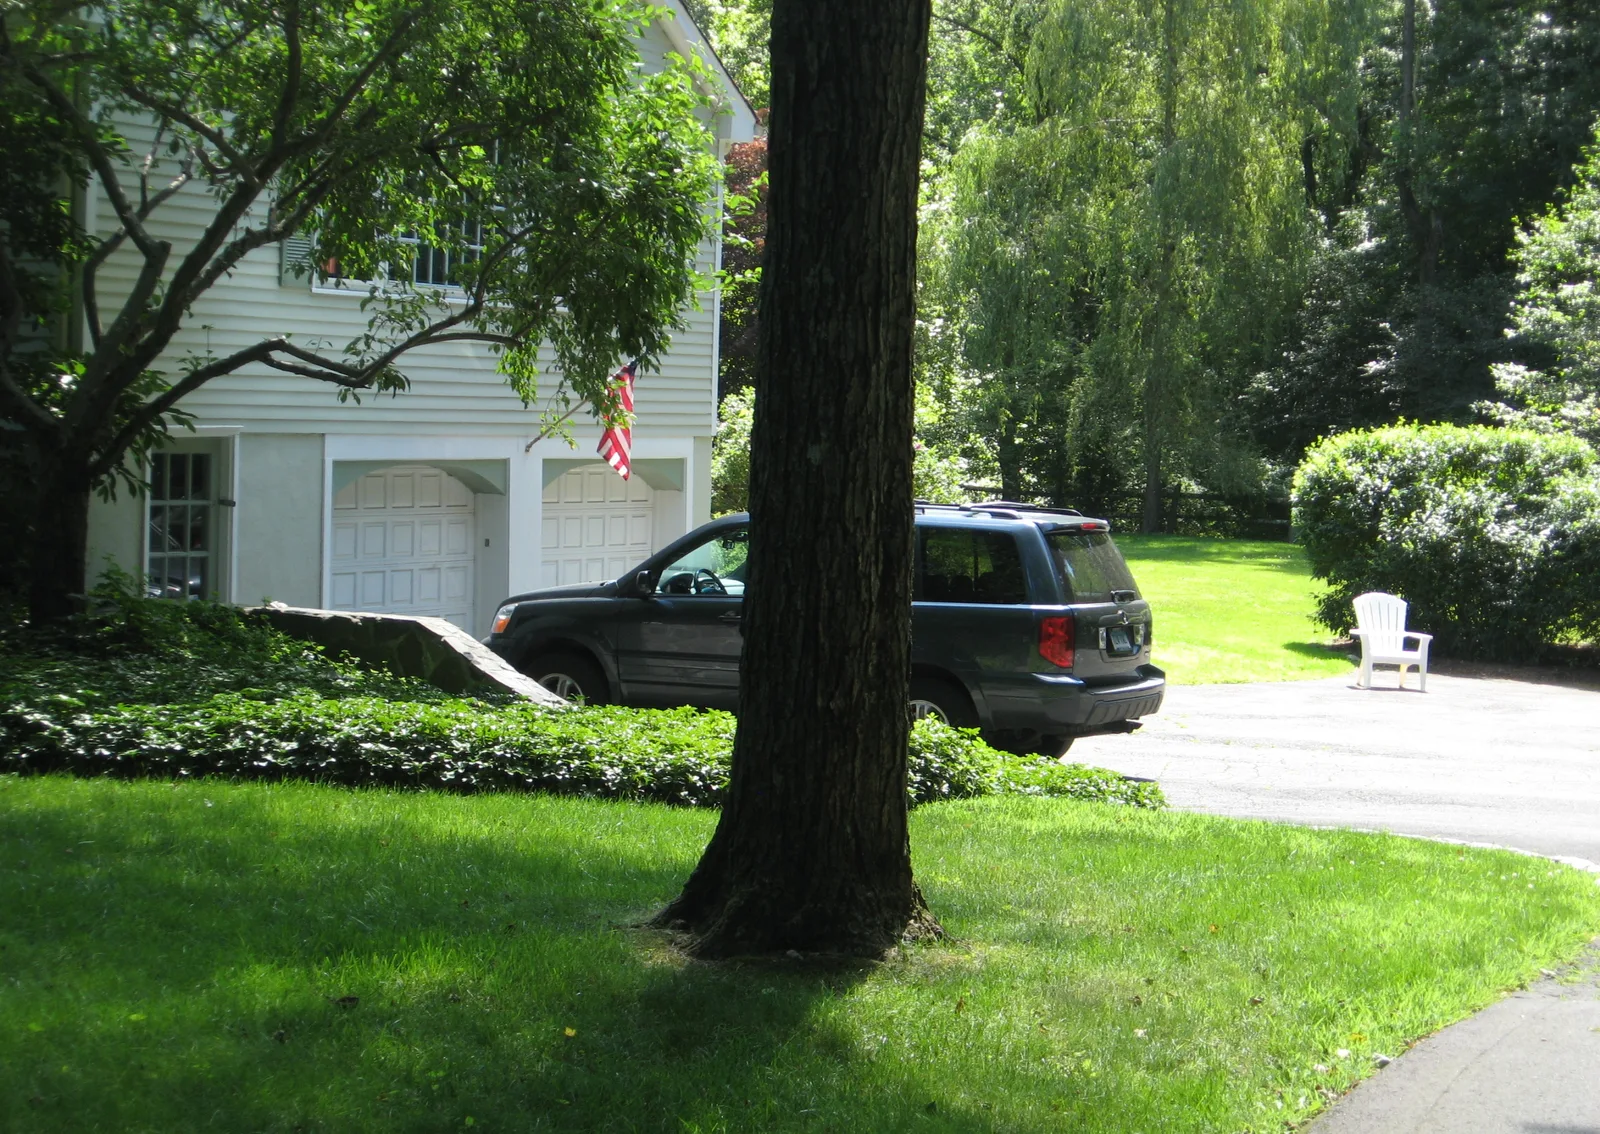
The fact that the driveway sloped towards the house compounded the flood situation.
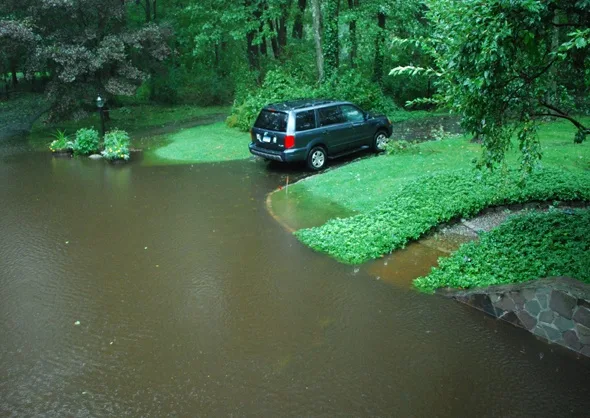
Here’s a shot the driveway, during one of the flood periods.
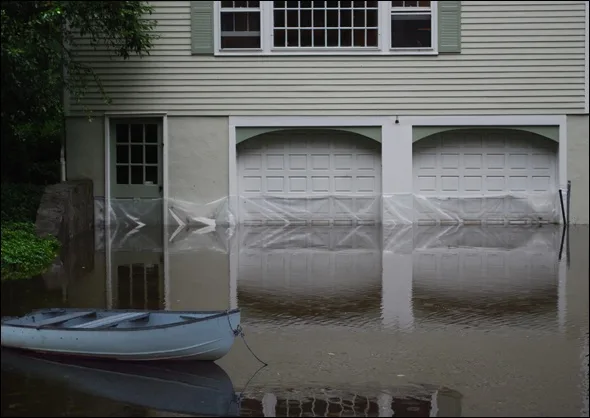
Turning around to look at the garage you can see that not only couldn’t you park your car in the garage, but the basement totally filled as well.
Heroic efforts were made to keep the water out, such as plasticing up the garage doors and putting up interior barricades, although it’s almost impossible to stop water going where it wants to go.
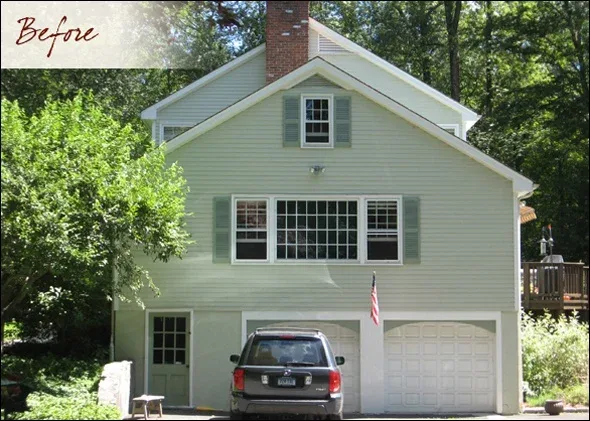
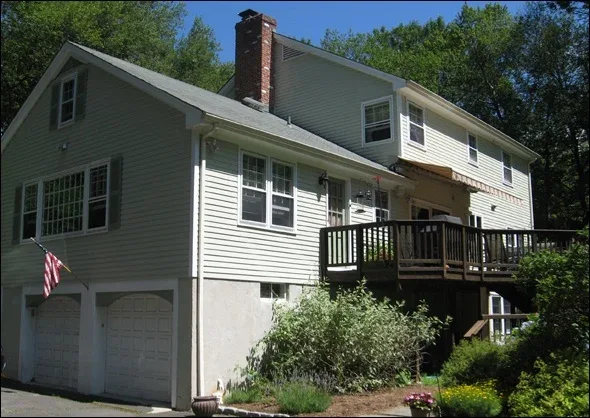
Here’s a couple shots of the home on a dry sunny day.
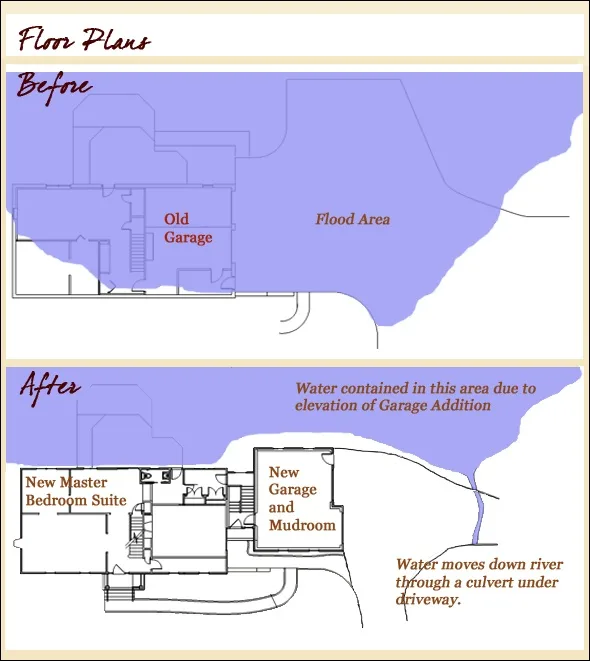
As we began the design process we discovered a lot of constraints on what was permissible. The Conservation Commission would not allow regrading around the house because of a concern that this would displace water downstream, which limited some of the options.
The plan that made the most sense was to close off all current points of water access into the house (garage doors, man door, back door under the porch) and then build an addition in the gully between the upper part of the driveway and the original garage.
This would gave our clients a structure at a higher elevation, with any doors a few inches above the flood plain. This would ensure that water would not invade the home during normal storm surges.
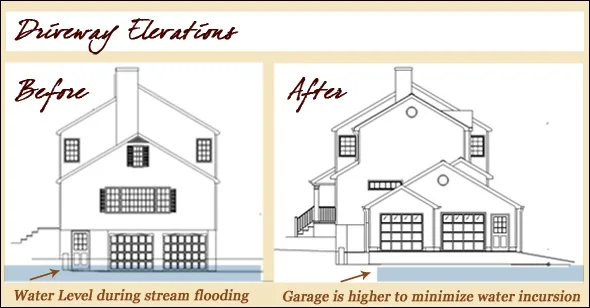
Here you can see visually how the water elevation changed as a result of the work. Positioning the addition in this way allowed us to keep the water back away from the house without regrading the yard.
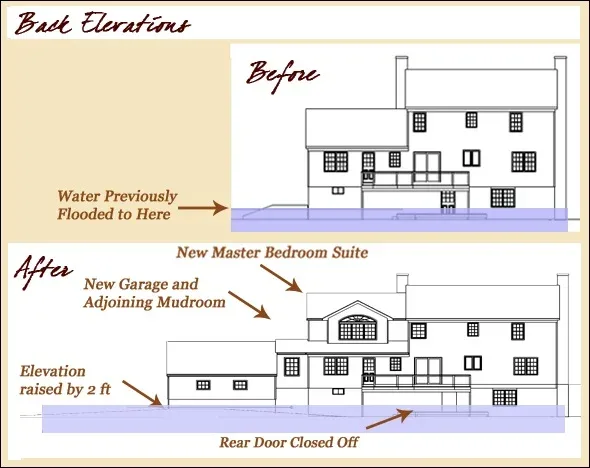
Similarly, at the back, the water was kept further away, because the garage is two feet higher than it was.
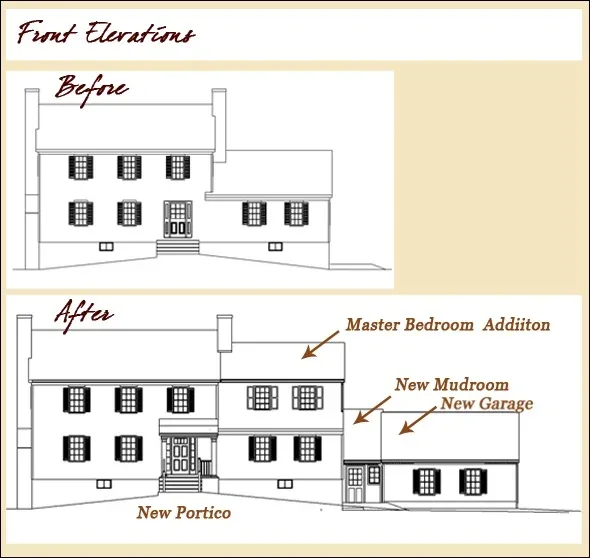
Our clients also wanted a master bedroom suite. Due to health code limiting the number of bedrooms, based upon septic tank size, it was desirable to maintain the same number of bedrooms while adding on. In order to do so, we “un-bedroomed” one of the old bedrooms, turning it into an open office and/or homework area.
This allowed us to add a master bedroom to the home while remaining within health department limits for “number of bedrooms” based on their existing tank, avoiding any septic costs.
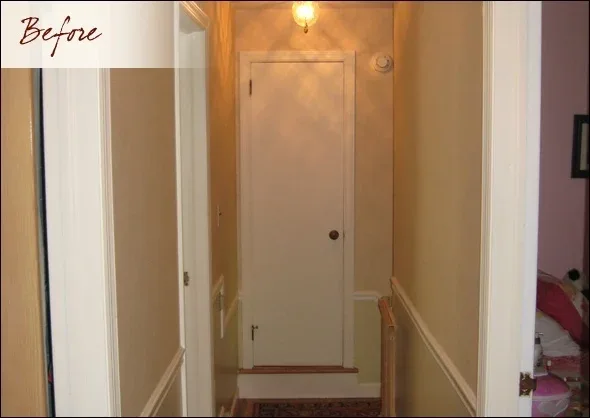
This door at the end of the hallway leads to an existing storage room over the family room.
On the left side of the hall at the top of the stairs is where we will be cutting the existing bedroom wall down. By opening up the door and creating a knee wall, the former bedroom will no longer considered as such.
This works well for our clients, who are happy to have this repurposed space.
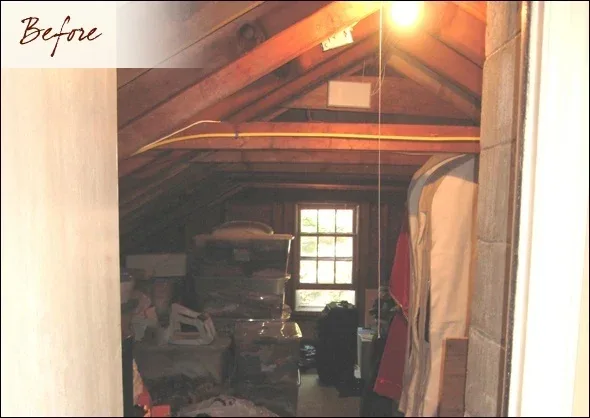
The existing storage room is the perfect place to create the new master suite.
It’s positioned to take advantage of backyard views, with easy access to the other bedrooms, as well as the stairs to the first floor.
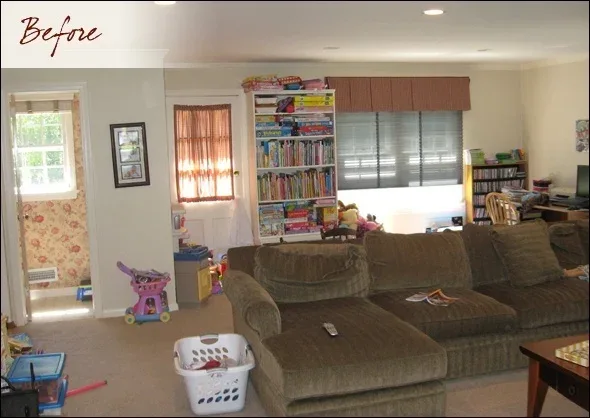
The existing oversized family will be converted into a smaller family room with a new mud room and a relocated powder room.
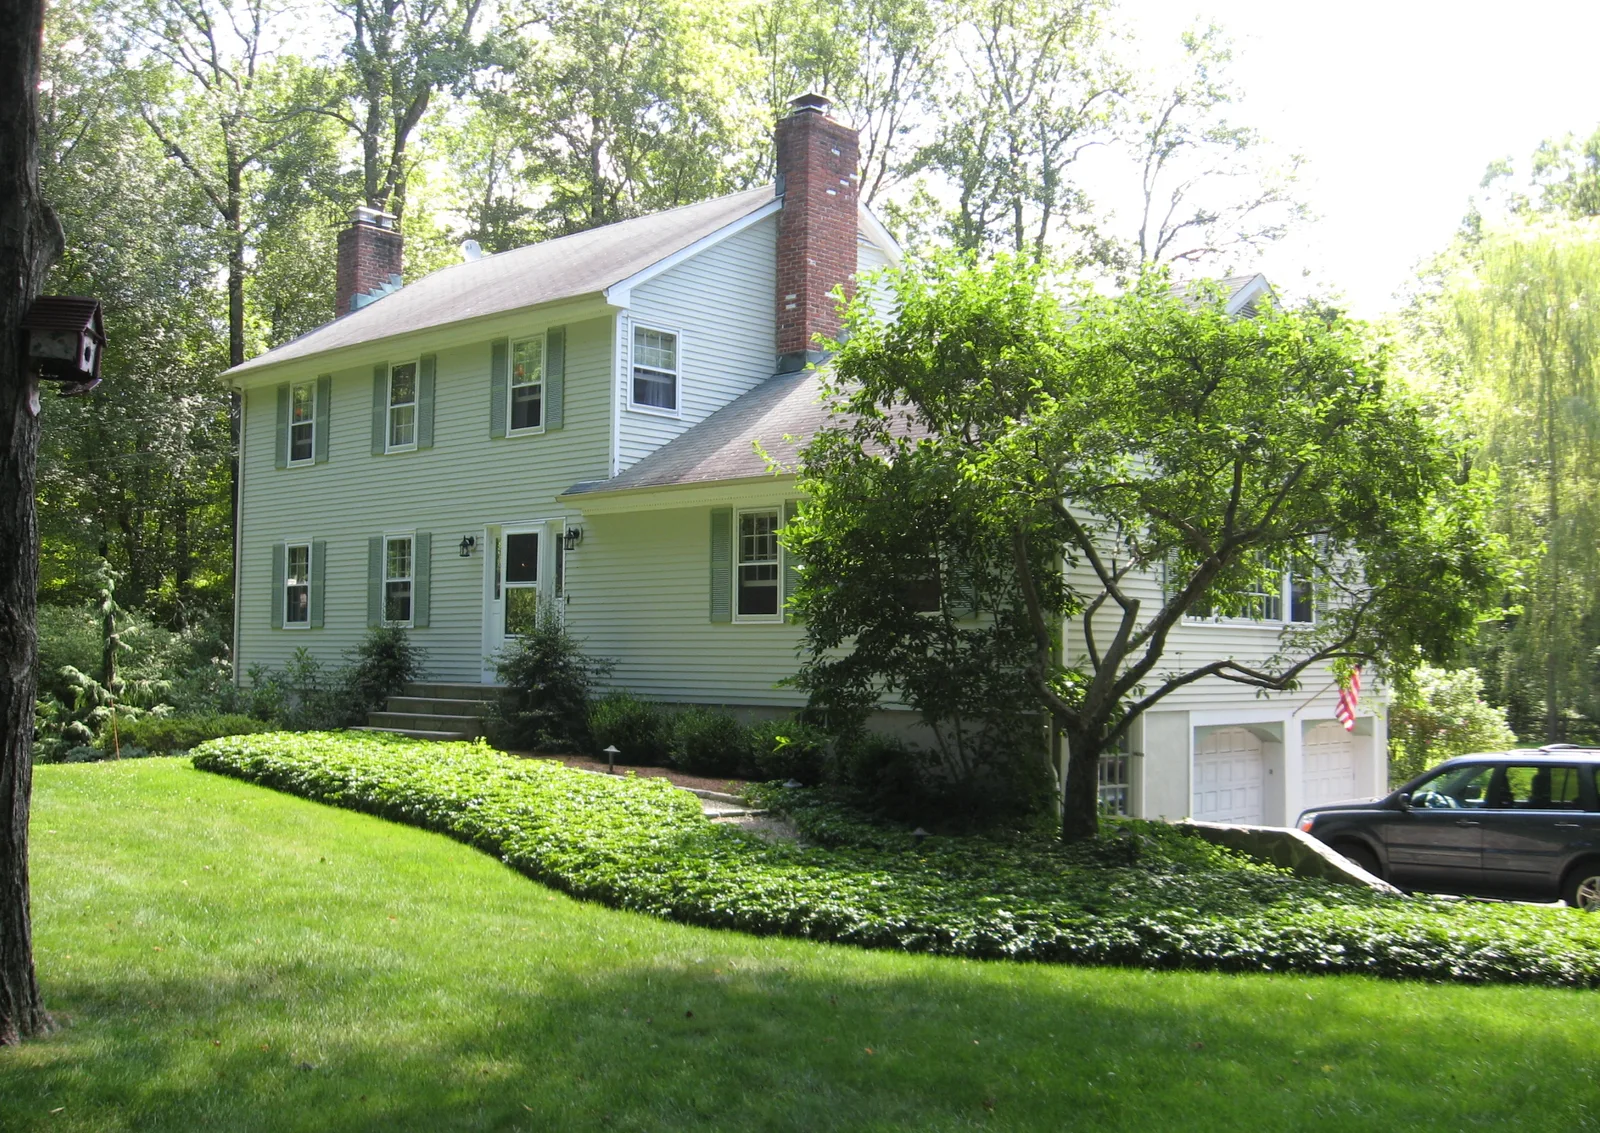
Here’s the “Before” of the front of the house. A portico will be added and the front stoop modified to jazz up the front facade.
Construction Begins
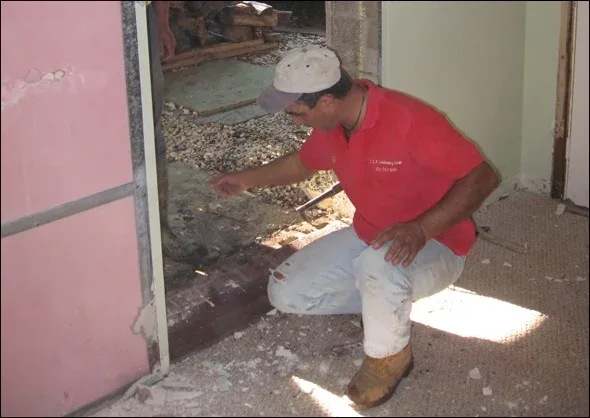
The first step in stopping water infiltration was to close up this playroom door and the door under the porch in order to alleviate the water problem before refinishing the interior.
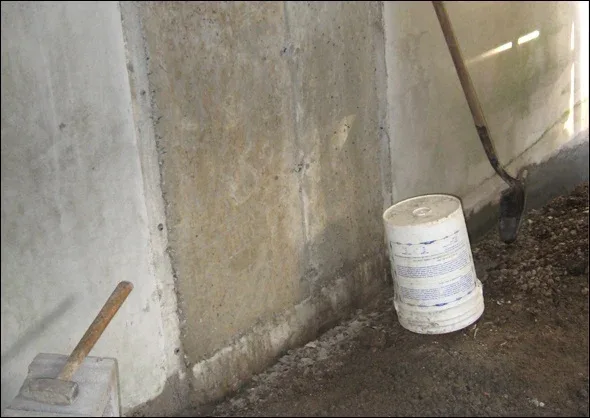
This exterior shot shows the opening to the former playroom after it was closed up.
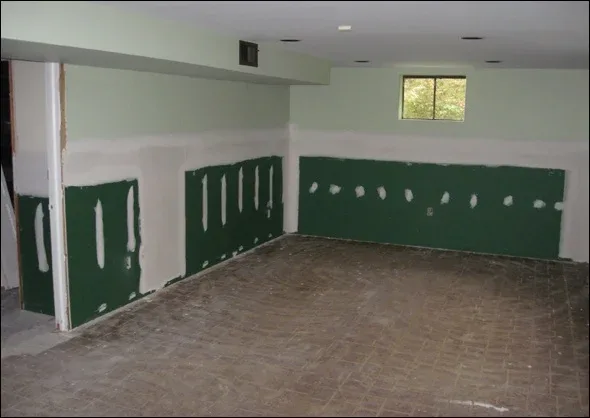
Just inside the closed up opening is the basement. We finished off this room in advance of the major construction so that the clients could use it for storage while we completed the remainder of the project.
The first step of the refinishing project was to replace the the former flood-damaged sheetrock and insulation.
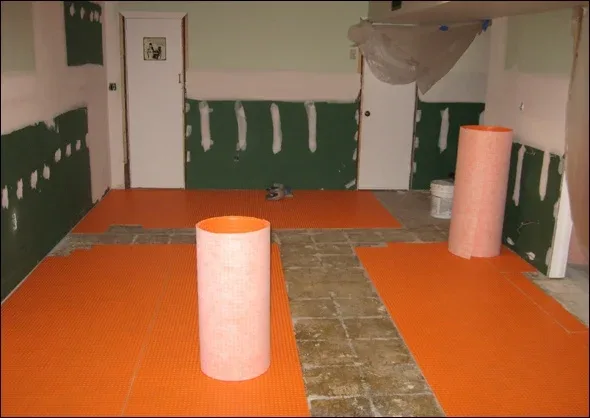
A special underlayment, Ditramat, was used on the cement before tiling to preclude tile cracking. We often use this material under large tiles, as it provides a superior, long lasting, final product.
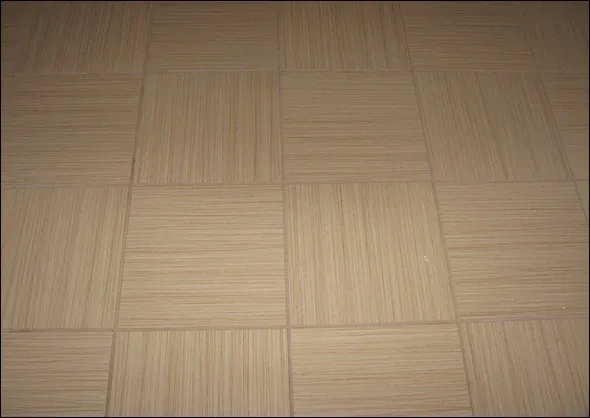
Here is a closeup of the finished product, showing a subtle pattern created by alternating the direction of the tile.
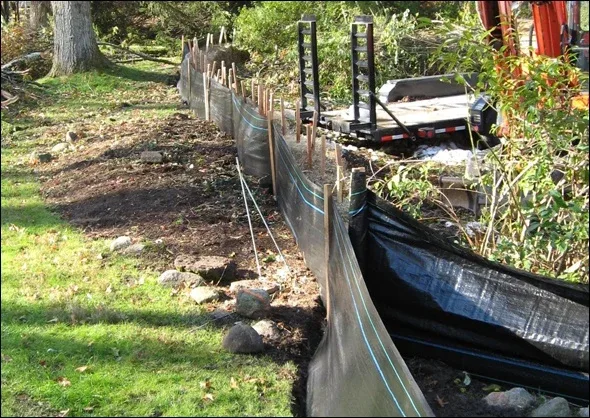
While installing the basement tile floor, the outside was being prepared for the addition portion of the project to start.
Silt fencing and hay bales were laid out to protect the wetland environment during construction.
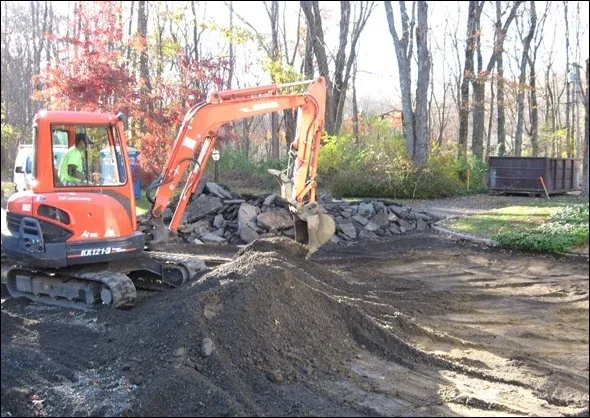
Necessary excavation began with removal of the asphalt driveway.
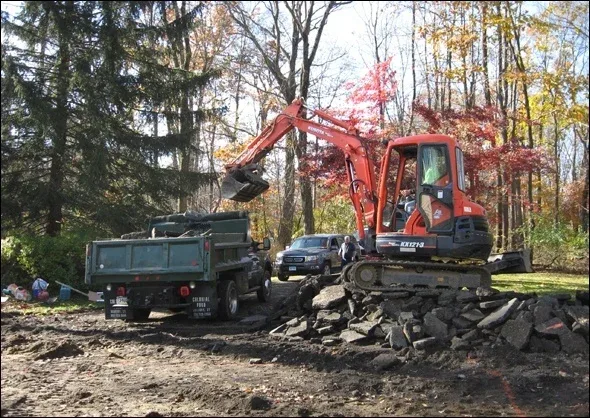
The old driveway was loaded into dump trucks and taken to a recycling center.
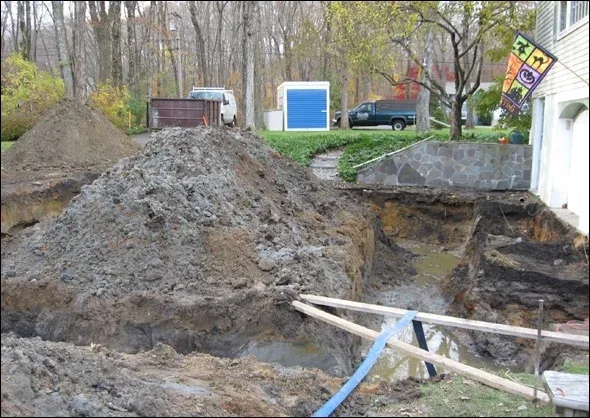
What looks like a moat is actually a trench for the new garage footings.
Because it was below the water table, the trench was filling with ground water so quickly that we had to pump continuously in order to get it dry enough to be able to pour concrete.
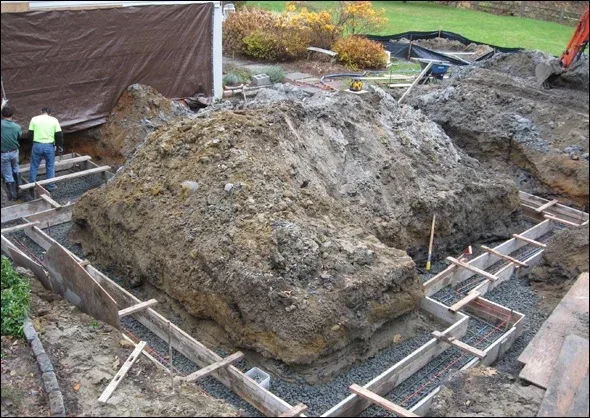
The footings were formed and poured, allowing the new garage to take shape.
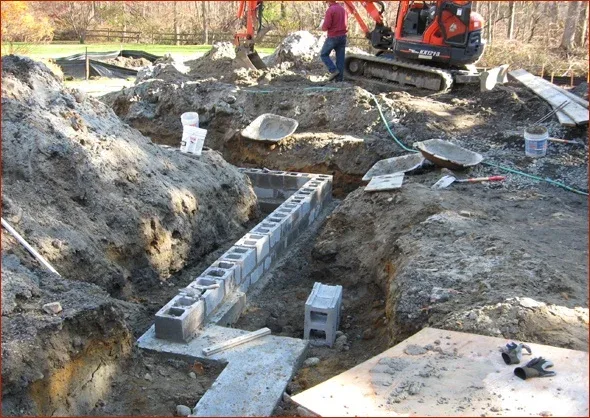
The first course of block was laid over the cured foundation.
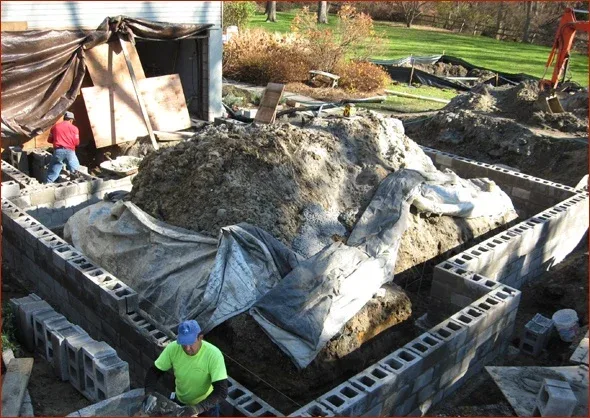
The masons continued to work on finishing the foundation.
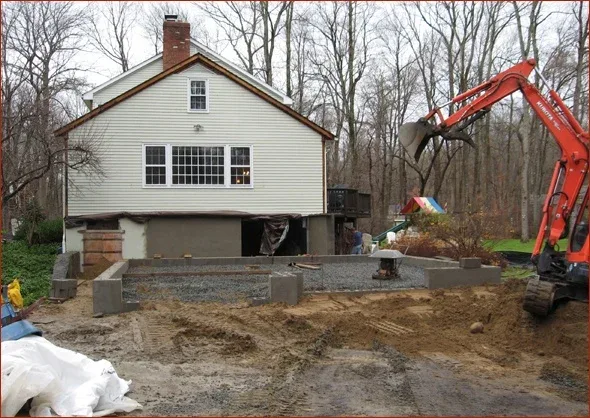
In the distance, you can see the former garage doors being closed up.
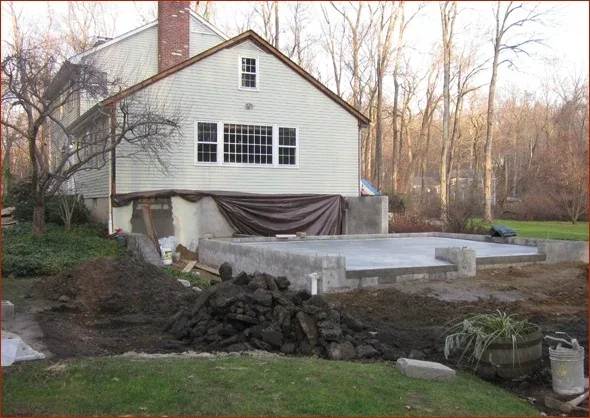
With the slab complete, it almost looks so flat you could skate on it!
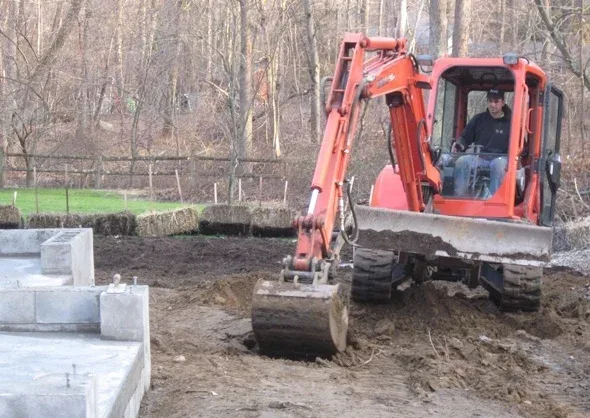
Backfilling was done next.
We brought in several truckloads of fill for use under the addition, but due to Wetlands requirements, the surrounding area had to be reshaped to its existing condition.
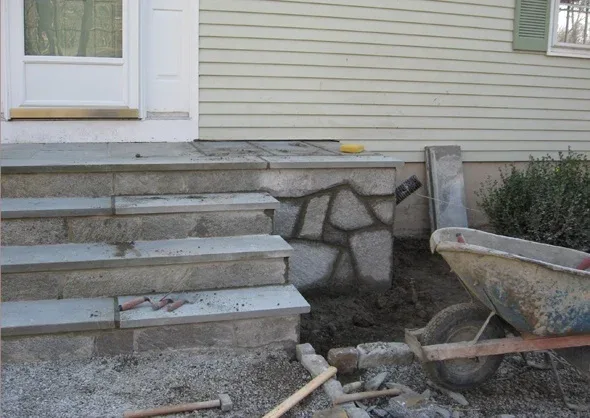
The masons extended the stoop, adding flagstone and a stone veneer.
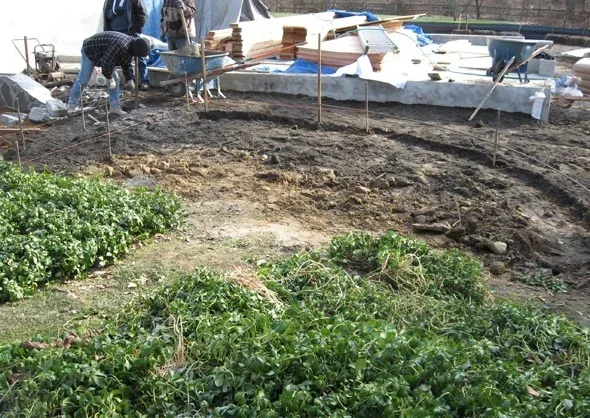
The sidewalk was reconfigured at the new grade, saving as many of the original plantings as possible.
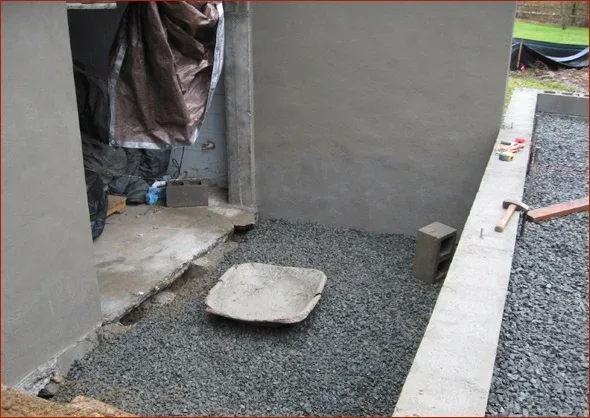
This view gives you an idea of how much higher the new garage, (on the right), will sit relative to the old garage, seen here on the left
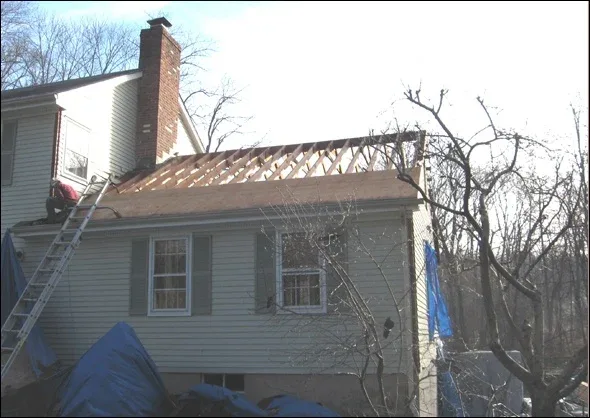
The next step was to frame the master bedroom addition.
As the plan was to raise the roof, we stripped the former storage room roof down to the joists, and then cut them back where the roof was to be raised, as you can see in the next photo.
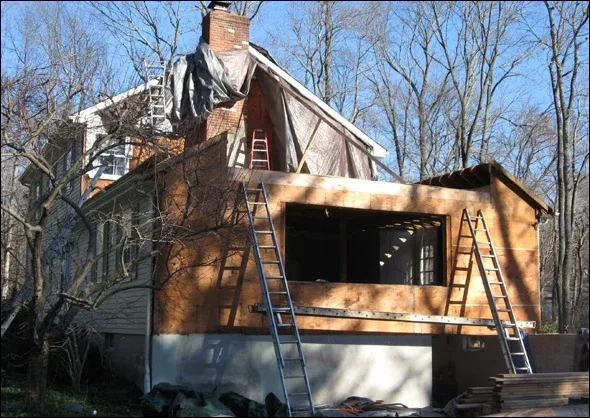
The demolition continued with the removal of the family room picture window and balance of the roof framing.
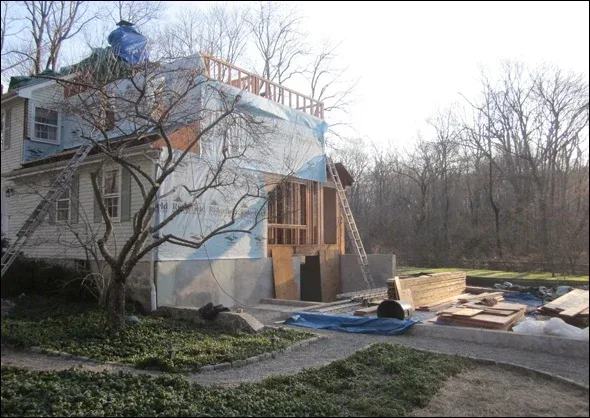
Here you can see the new master bedroom suite is taking shape.
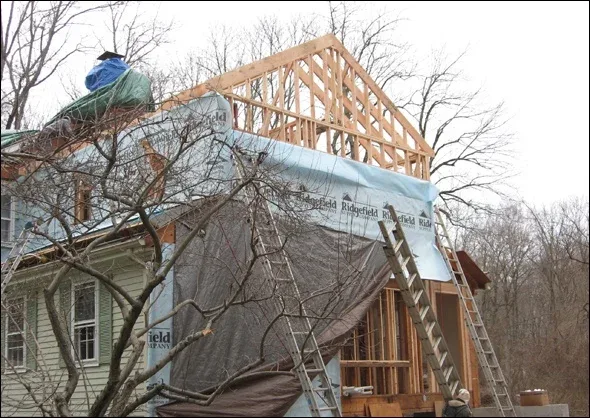
As the master bedroom roof was framed the addition started to mimic the rooflines of the original house.
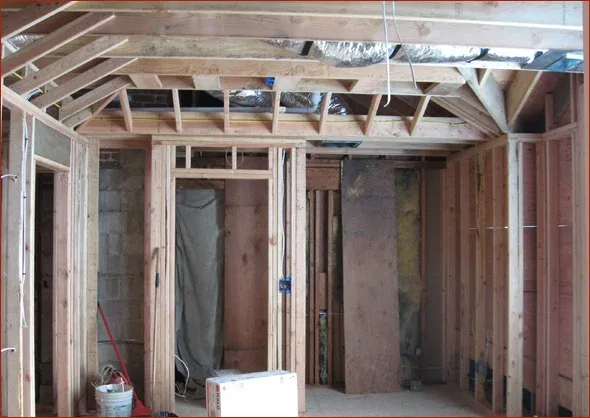
The shape of the master bedroom’s tray ceiling can be seen in the framing.
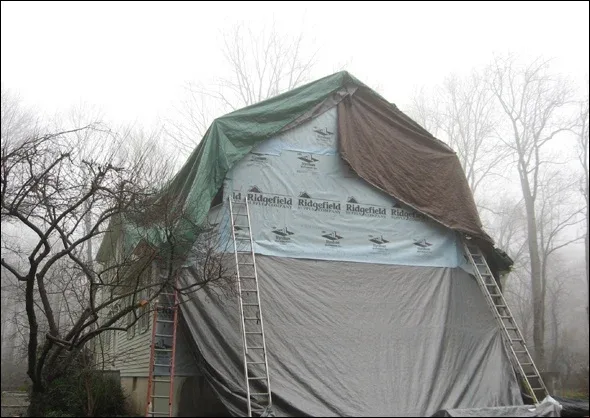
Oversized tarps kept the cold winter rains out of the home while work continued inside.
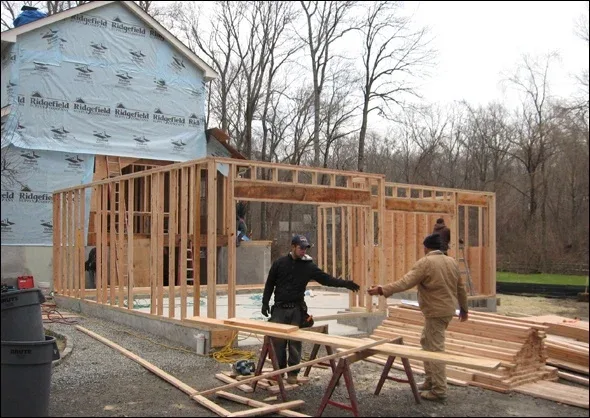
With the roof on the master suite complete and the home buttoned up tight with a moisture barrier, framing of the garage could begin.
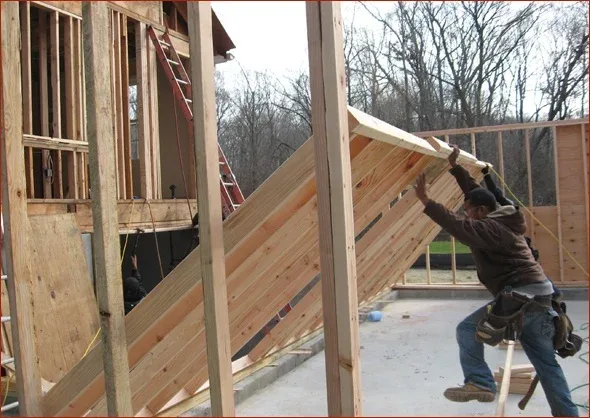
To speed the framing process, walls were constructed in their entirety on the floor and then raised into place.
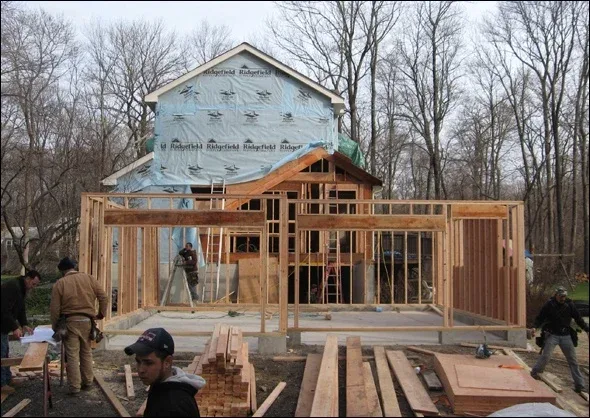
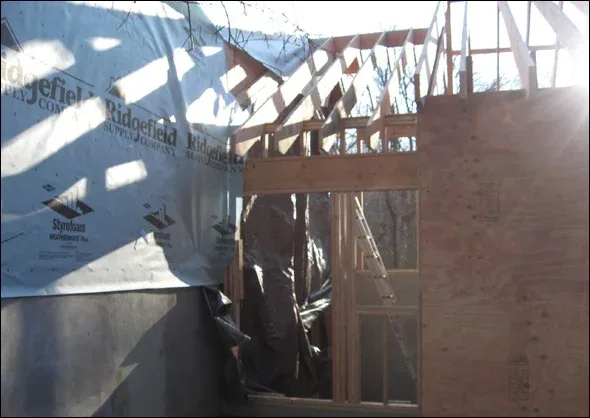
With the walls up, the oversized garage is really starting to take shape.
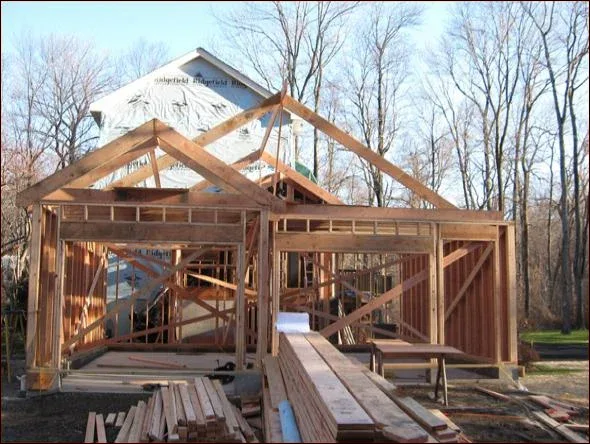
Repeating the original gable rooflines made for a seamless addition.
The new mud entry attaches the new garage to the house.
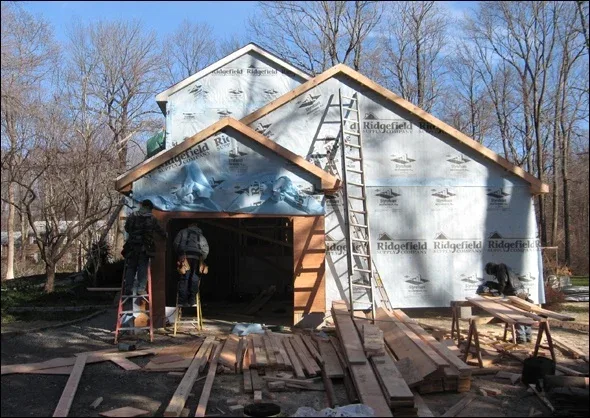
Now everything’s buttoned up, ready for exterior trim and siding.
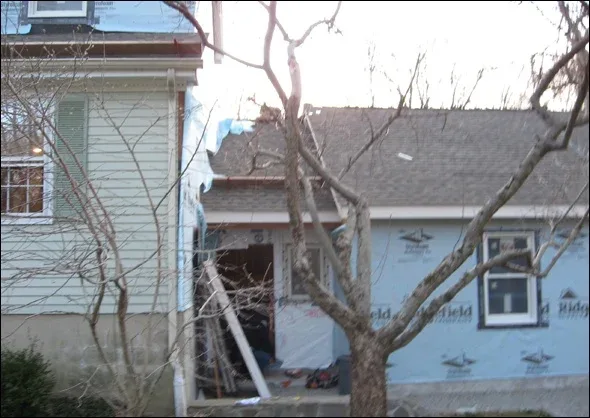
Advanced planning of the addition’s location allowed this tree in the front yard to be saved.
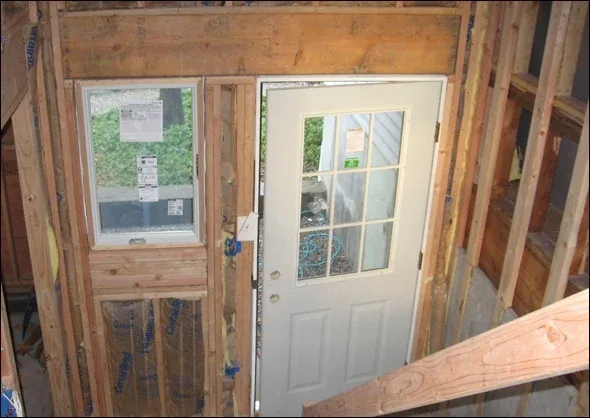
Looking down from the upper landing you can see the newly installed mud entry door.
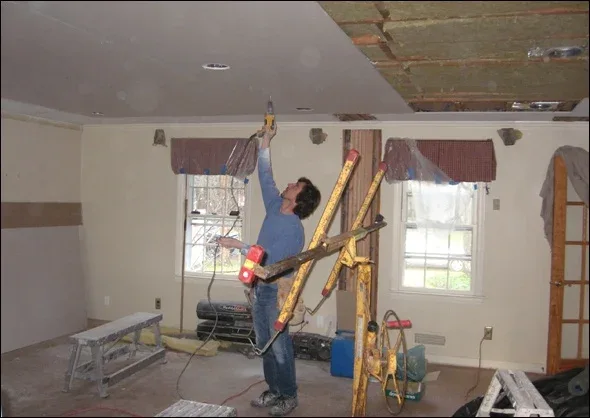
Here you can see sheetrock being installed on the family room ceiling.
A hand crank sheetrock lift that was used to raise the large pieces of sheetrock into position, faciliating their manipulation and speeding up the process.
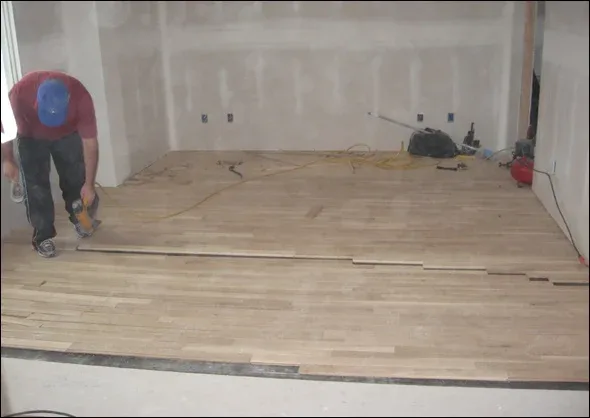
Oak floors were laid in the new master bedroom, family room and mudroom.
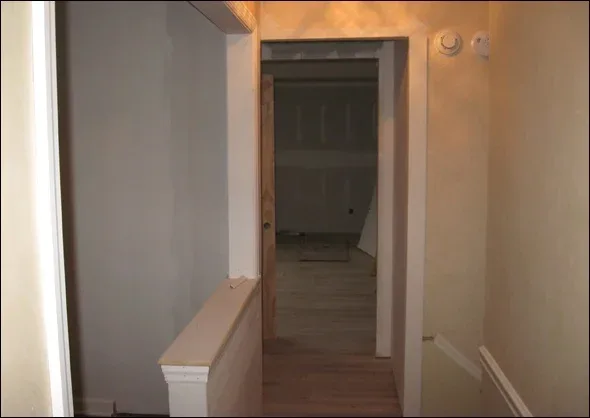
On the left you can see the existing guest bedroom wall which was cut down.
If you look past this new office area, you can see into the new master bedroom suite, which was converted from the storage room.
These areas are trimmed and ready for paint.
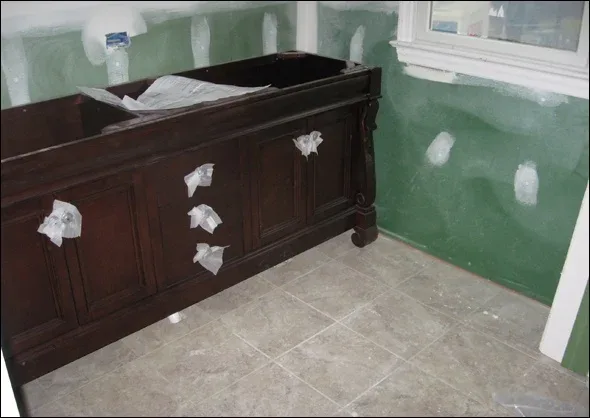
A beautiful furniture style double vanity is the star of the new bathroom.
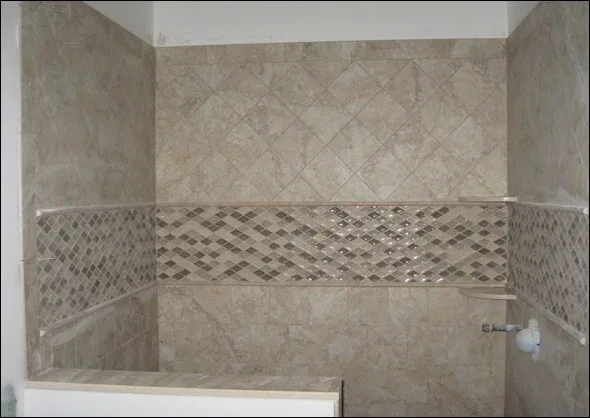
Creative tile layouts helped break up an over-sized shower.
Once the shower tile was completed we were able to template for the frameless glass shower enclosure.
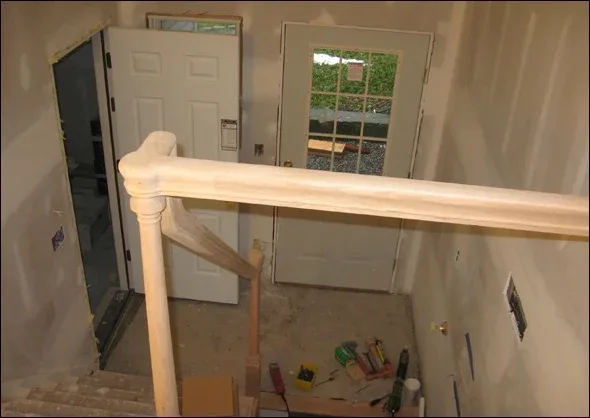
While trim is being completed through out the house, finishing touches such as the newel posts and banister for the mudroom entry could be installed.
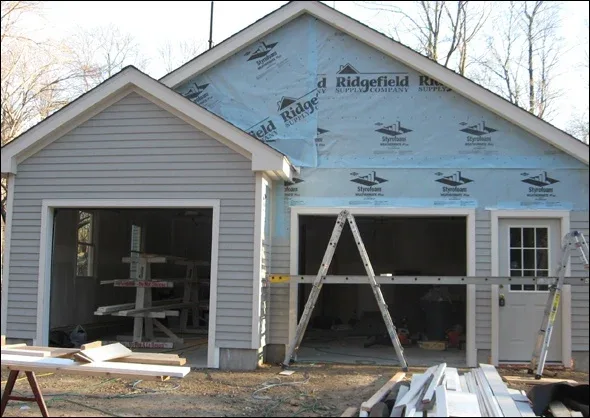
Interior and exterior work ran concurrently. Siding and trim were installed as the project neared completion.
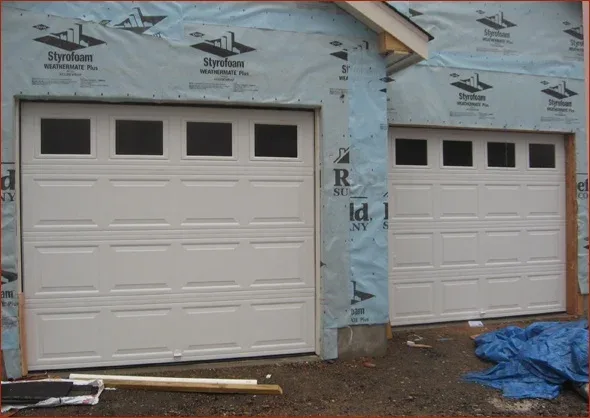
New garage doors and openers were installed. These newer doors offer superior insulation and quieter operation than their older counterparts.
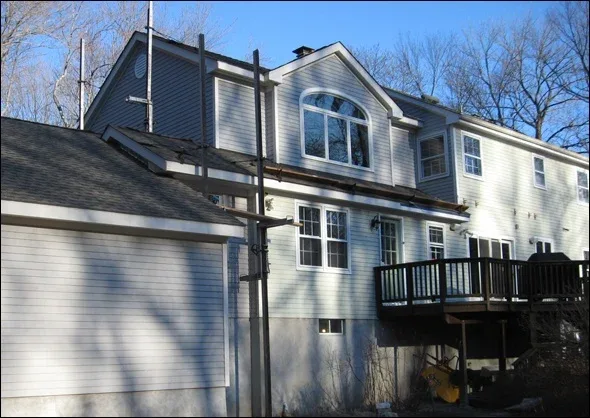
Ladder jacks and scaffolding made it possible to do the siding on the back of the house with ease.
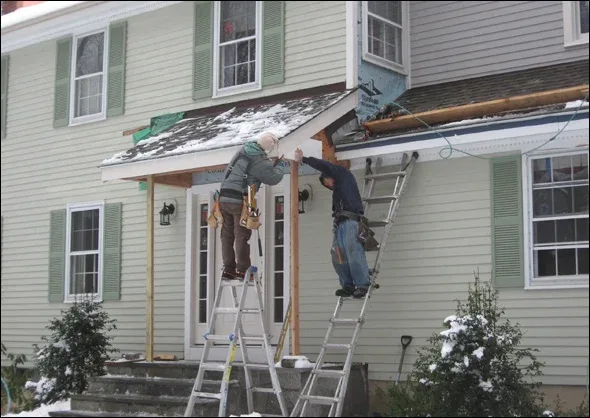
The new portico was constructed and trimmed out.
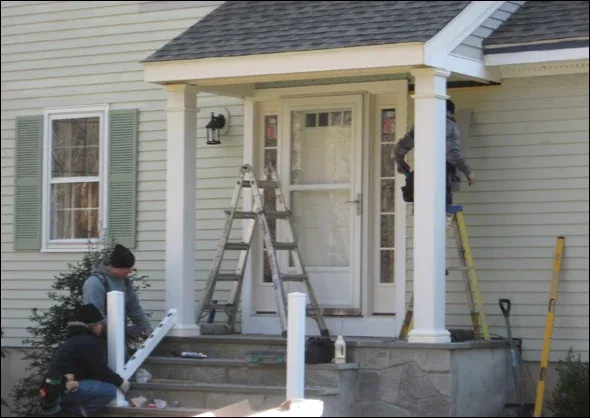
Square columns and maintenance free railing materials were installed to finish it off.
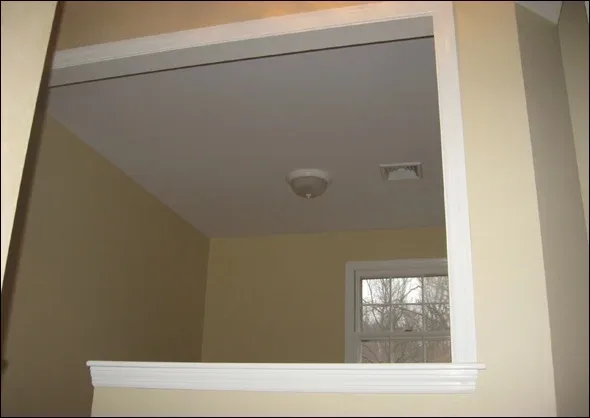
An added benefit of opening up the wall at the new office was bringing natural light into a previously dark second floor hall.
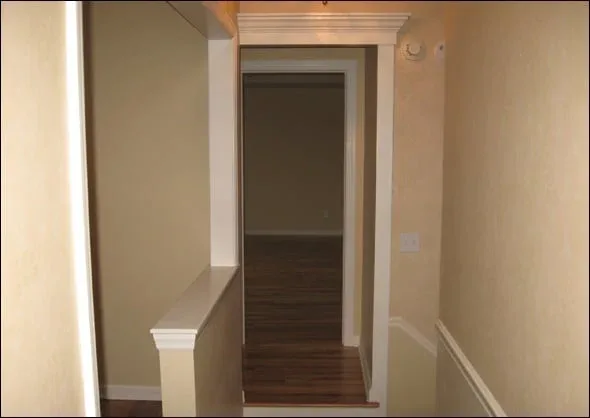
Here you can see the view into the master bedroom suite after it was painted and ready for move in.
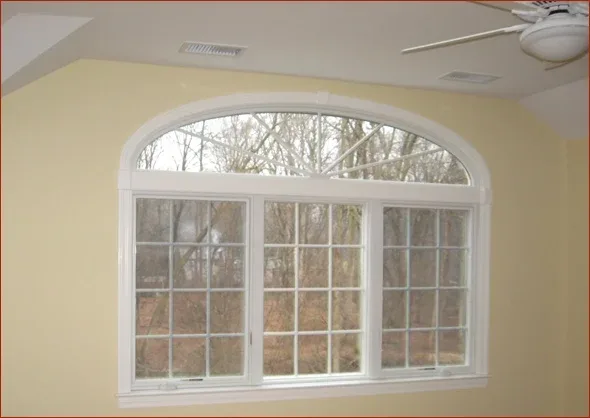
The placement of this window opposite the bed wall ensures opening your eyes to a beautiful view each morning.
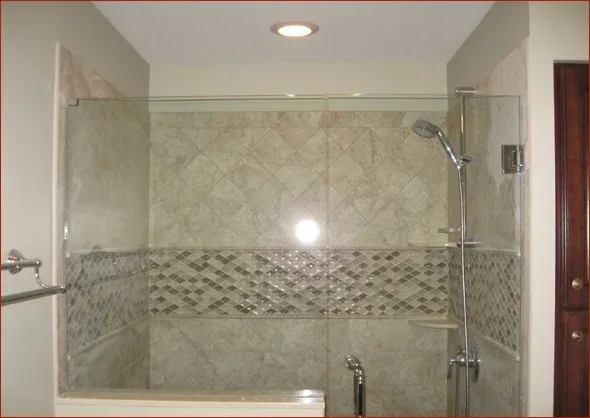
The completed shower offers an abundance of glass to provide natural light and a view through nearby windows.
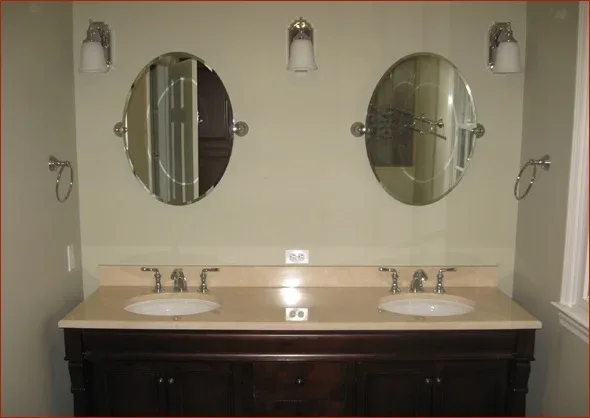
The vanity is topped with honed marble, which elegantly contrasts its dark finish.
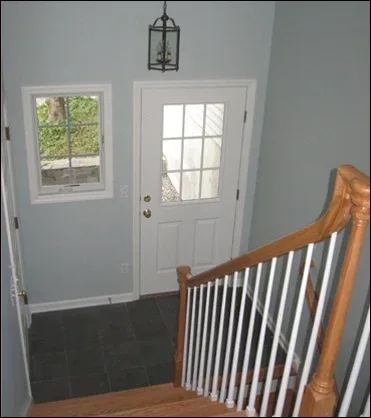
Here you can see the completed mud entry finished with warm bright colors, inviting you into the home.
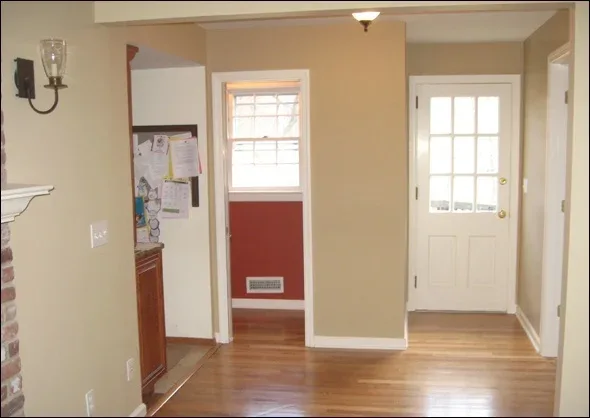
Continuous oak flooring in the powder room, family room and the mudroom make these spaces flow smoothly together.
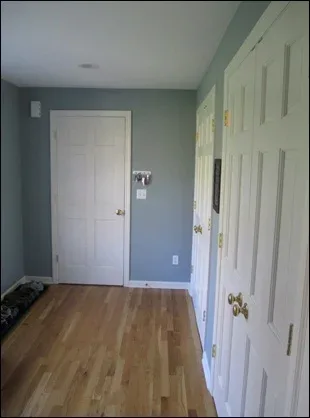
Here’s the mud room we keep mentioning, completed.
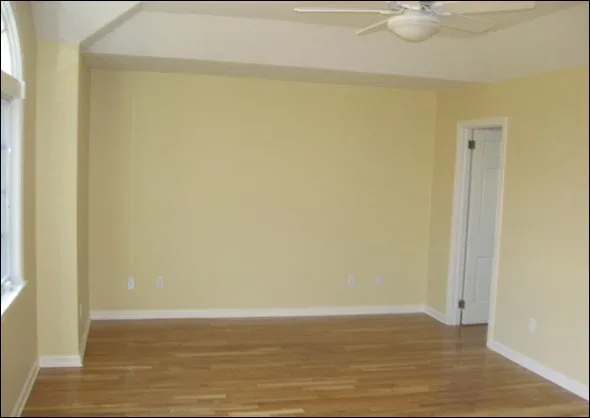
The finished master bedroom shows how the tray ceiling adds height and drama to the space.
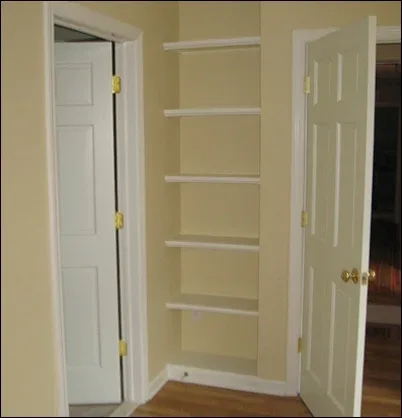
A small niche behind the master bedroom door made the perfect place to add some book shelves.
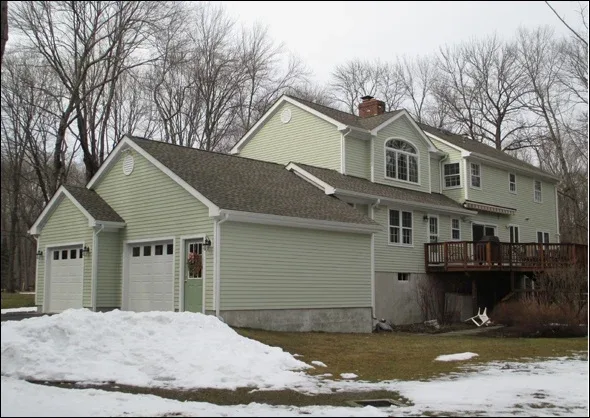
Here are some completed shots of the master bedroom suite, after painting.
From the back, you can see the new master bedroom suite atop the family room, with the garage to the left.
Here you can see the completed addition and garage with a gravel walkway to the mud entry door.
Note the horizontal window in the family room where the client’s children can peek out and see who’s coming down the driveway.
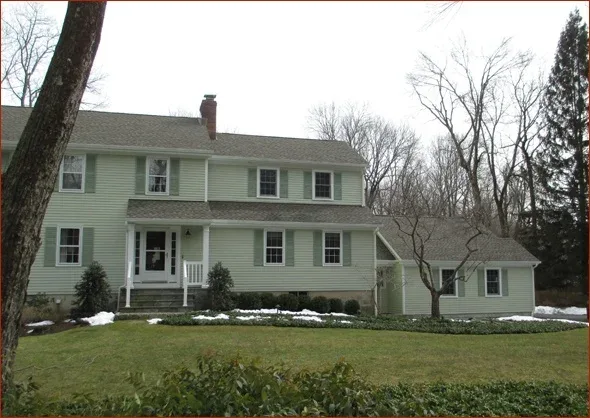
In this view of the completed front you can see how the new roof lines work seamlessly with the old.
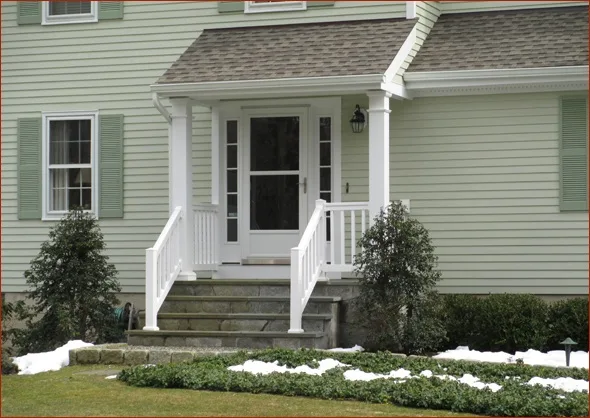
And last but not least, the front entry is completed and ready to welcome friends and family into their newly updated and water tight home.
“We have done three projects with Clark Construction in the last five years and continue to be thrilled with the results. The common thread through all of the projects has been the detail of project planning and design, the quality of the work, and the ability to stay right on schedule.”

Jeff P.
Wilton, CT